How to Edit SVG Like a Pro (Without Opening Illustrator)
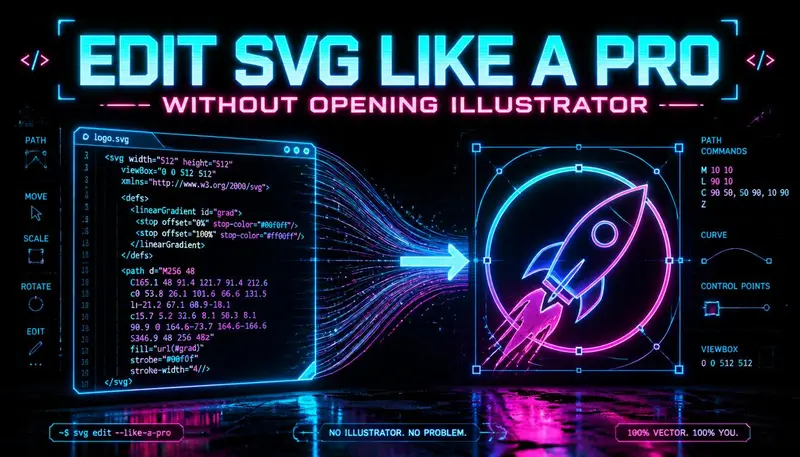
How to Edit SVG Like a Pro (Without Opening Illustrator)
Scalable Vector Graphics (SVG) are everywhere. From icons and logos to complex illustrations and data visualizations, they form the visual language of the modern web. For years, the standard workflow has been to create or edit these files in heavy, expensive design applications like Adobe Illustrator or Sketch. But what if you could edit them with the same speed, precision, and power you have in your code editor? What if you could treat SVG not as a graphical asset, but as what it actually is: a text file containing structured code? This guide is designed for developers, designers, and anyone in between who wants to master the art of editing SVG files quickly, efficiently, and completely free of bulky design software. We will explore a code-first workflow that relies on the tools you already use daily: your code editor, browser developer tools, the command line, and a few indispensable libraries. By the end, you will not only be able to edit SVGs with confidence but also optimize them for performance, animate them, and automate repetitive tasks—all without ever opening Illustrator.
This isn't about choosing one tool over another. It's about gaining a new perspective. When you open an SVG file in a text editor, you see a structure of XML tags: `<svg>`, `<path>`, `<circle>`, `<rect>`, and `<g>`. Each of these elements has attributes that define its size, position, color, and shape. This is the DNA of the graphic. By understanding and manipulating this code, you gain a level of control that is often hidden behind the layers of a graphical user interface. You can make edits with the precision of a surgeon, change colors across an entire project with a single find-and-replace, and build dynamic, responsive graphics that adapt to their environment.
One clarifying note before we dive into the practical techniques: this guide is not a tutorial on how to become a graphic designer. It is a guide for anyone who needs to manipulate SVG files as part of their workflow—whether you're a frontend developer who receives assets from a designer, a product manager who needs to tweak a logo for a presentation, or a maker who loves to tinker. The goal is to demystify the SVG format and provide you with a powerful, repeatable process for editing it, saving you the time, money, and system resources required by traditional design software.
If you liked this sectionThe Best Frontend Agent Skills in 2026 (Official + Community)95%+
of websites use SVG elements, making it the most common vector format for web graphics, according to W3Techs.
Text-based
SVG is an XML-based markup language, which means it can be opened, edited, and debugged in any code editor, just like HTML.
10x to 100x
SVG files are often smaller than their raster counterparts (like PNGs or JPEGs), especially for simple graphics, logos, and icons, leading to faster load times.
~50%
of an average web page's code can be dedicated to CSS and images, with SVG playing a crucial role. Editing them efficiently can significantly speed up development cycles.
1.4 MB
The memory footprint of a modern, lightweight code editor like VS Code, compared to the multi-gigabyte footprint of a full design suite like Illustrator, making the code-first approach incredibly resource-friendly.
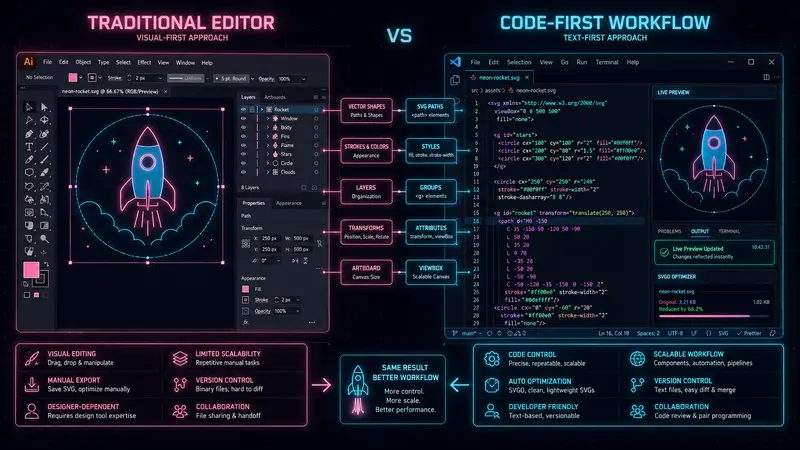
Why Editing SVG in a Code Editor Is a Superpower
The ability to edit SVG directly in code isn't just a neat trick; it fundamentally changes how you interact with graphics, providing an unprecedented level of precision, automation, and efficiency that's simply impossible to achieve with a point-and-click interface.
If you liked this sectionModern Techniques in Frontend DesignThe primary advantage is **precision and control**. When you move a point on a path in a tool like Illustrator, you are relying on the software to do the math. When you edit the `d` attribute of a `<path>` tag, you are the one in control. You can directly see and manipulate the coordinates (M, L, C, Z commands), guaranteeing the exact outcome you intend. This is crucial for complex data visualizations, infographics, or icons where every pixel matters.
The second major benefit is **automation and bulk editing**. Need to change the color of every icon in a 100-icon project? A simple find-and-replace in your code editor can do this in seconds. Need to scale a whole set of assets? You can write a short script or use a task runner. This is a superpower for maintaining design consistency and handling large-scale changes that would take hours manually.
Thirdly, it unlocks a powerful **integration with your web development workflow**. CSS, JavaScript, and HTML are all text-based. By bringing SVG into this same environment, you can style it with CSS, make it interactive with JavaScript, and embed it directly into your HTML without the performance overhead of an external image file. This leads to a seamless developer experience.
Part 1: Understanding the SVG Anatomy
Before you can edit code like a pro, you need to understand its structure. An SVG file is essentially a container. Let's look at a simple example:
<svg xmlns="http://www.w3.org/2000/svg" width="100" height="100" viewBox="0 0 100 100"> <circle cx="50" cy="50" r="40" fill="blue" stroke="black" stroke-width="3" /></svg>Here is the breakdown of the key parts:
- **`<svg>`**: The root element that defines the start of the SVG graphic. Its `xmlns` attribute is the namespace and should always be included.
- **`width` and `height`**: Define the size of the graphic in pixels, unless specified otherwise.
- **`viewBox`**: This is one of the most critical attributes. It defines the coordinate system for the SVG. `viewBox="0 0 100 100"` sets up a 100x100 grid starting at (0,0). The graphic will then be drawn and scaled to fit the `width` and `height` you set.
- **`<circle>`**: A basic shape element. Its center (`cx`, `cy`), radius (`r`), and styles (`fill`, `stroke`, `stroke-width`) are defined as attributes.
- **`<path>`**: The most powerful element. The `d` attribute contains a series of commands (M = move to, L = line to, C = bezier curve, Z = close path) that can draw any shape.
Common SVG Elements You'll Edit
- **`<g>`**: The group element. Used to group other elements together, allowing you to apply transformations or styles to an entire set of objects at once.
- **`<rect>`**: For drawing rectangles.
- **`<ellipse>`**: For drawing ellipses.
- **`<line>`**: For drawing simple straight lines.
- **`<polyline>`**: For drawing connected straight lines.
- **`<polygon>`**: For drawing closed shapes with multiple sides.
- **`<defs>`**: A container for reusable elements (like gradients or symbols) that aren't rendered immediately but can be referenced elsewhere.

Part 2: Essential Tools for Code-First SVG Editing
Your primary weapon will be a good code editor, but you'll also want a few other browser-based tools and libraries in your arsenal to make the workflow truly professional.
1. Code Editors: Your Primary Workspace
The most essential tool is a modern code editor. Both VS Code and Sublime Text offer excellent built-in support for XML/HTML, which is the foundation of SVG. But to truly elevate your workflow, you need extensions.
- **`SVG Preview`**: This extension allows you to see a live preview of your SVG file as you type. It's invaluable for seeing the impact of your edits instantly.
- **`Prettier` / `SVG Formatter`**: SVG code can quickly become a mess of minified lines. A formatter keeps the code clean and readable, making it easier to navigate.
- **`EditorConfig`**: Helps maintain consistent coding styles (like indentation, line endings) across a team, keeping your SVG files clean and version-control friendly.
2. Browser Developer Tools (DevTools)
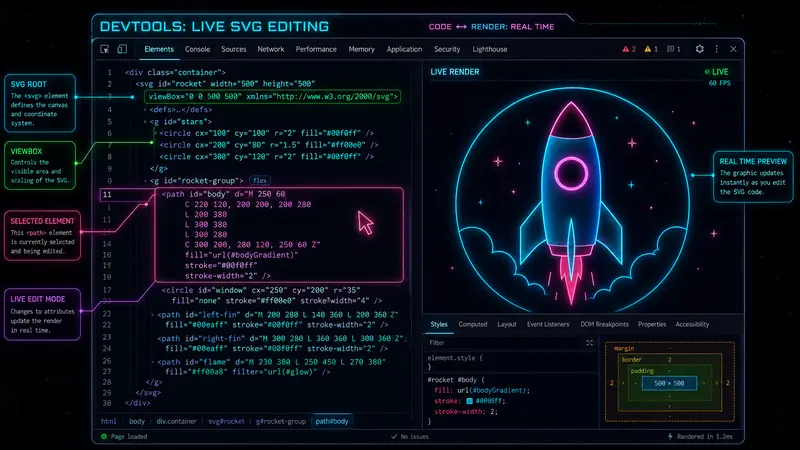
Your browser's DevTools (F12 or Right-click > Inspect) are an absolutely critical part of the workflow. In the 'Elements' panel, you can see the SVG code as it exists in the page's HTML. More importantly, you can edit it live, making changes to the code and instantly seeing the results on the page. This is the fastest way to experiment with colors, sizes, positions, and more. The 'Styles' panel also shows you the CSS applied to the SVG, letting you test and tweak styling rules in real-time.
3. Essential Libraries and CLI Tools
For advanced editing, optimization, and automation, you'll want to leverage powerful command-line tools.
- **`svgo` (SVG Optimizer)**: This is the industry standard for optimizing SVG files. It removes unnecessary metadata, comments, and hidden elements, and simplifies paths. It can often reduce an SVG's file size by 50-90% with no visible difference. Install it with `npm install -g svgo`.
- **`svg-sprite`**: A tool for generating SVG sprites, which combine multiple SVG icons into a single file. This reduces HTTP requests and improves page load performance. You can install it with `npm install -g svg-sprite`.
- **`Inkscape` (Command-line)**: While Inkscape is a full graphical editor, its command-line interface is powerful. You can use it to convert between different file formats (like PDF to SVG), manipulate the geometry of the graphic, and perform other complex actions programmatically.
SVG 2.0 Specification (Official W3C)
For the most definitive and up-to-date information on SVG elements, attributes, and standards, the official W3C specification is the ultimate resource. Bookmark it for your deep dives.
Read the SpecPart 3: The Pro Editing Workflow
Now, let's get down to the practical side. Here is the step-by-step workflow a pro uses to edit SVG files without a graphic design tool.
Step 1: Open and Examine the SVG
Open your SVG file in your code editor. Use a formatter if the code is minified to make it more readable. Take a moment to understand its structure. Look for the `<svg>` tag. What are its `width` and `height`? What is the `viewBox`? Are there `<g>` groups you can use to select and move entire sections at once? This reconnaissance phase is vital.
Step 2: Live Editing with Browser DevTools
Open the SVG file in your browser (you can just drag and drop it). Right-click on the graphic and select 'Inspect Element' (or its equivalent). This will open the DevTools and highlight the `<svg>` element in the HTML. Now, you can directly edit the code in the Elements panel. Try changing the `fill` attribute of a shape from `blue` to `#e74c3c`. Boom, the change happens instantly on the page. This is your playground. You can change coordinates, add new shapes, or delete elements, and see the result immediately.
Step 3: Precision Edits in Your Code Editor
Once you've experimented and know the changes you want, make the precise edits in your actual source file in the code editor. This is where you can write complex new paths, use a find-and-replace to update all colors, or add new elements. Remember, because you're editing a text file, you can leverage all of your code editor's power.
Step 4: Optimize and Minify
Before your SVG is production-ready, run it through `svgo`. The command is simple: `svgo input.svg -o output.svg`. This will strip away all the unnecessary data, leaving you with a lean, performant file that is as small as possible.
Step 5: Version Control Integration
Because you're working with text files, you can leverage Git or your preferred version control system for SVG. This means you can track changes, revert to previous versions, and collaborate more effectively. The diff output from Git will show exactly what code was changed in a pull request, making it easy to review graphic changes right alongside the code they support.
Part 4: Pro Techniques and Practical Examples
Knowing the workflow is one thing; knowing how to apply it to solve real-world problems is what makes a pro. Here are some common scenarios you will encounter.
Scenario 1: Changing Colors with Find & Replace
You've got an icon set consisting of 50 SVGs, and the brand color has just changed from `#FF5733` to `#00A86B`. Opening each file in a design tool and changing the color one by one is a path to a headache. Instead, with a code-first approach, you can use the find-and-replace feature in your code editor. Open the entire folder of icons in VS Code and use 'Find in Files' (Ctrl+Shift+F) to find `#FF5733` and replace it with `#00A86B`. The change is applied in milliseconds.
Scenario 2: Customizing an External SVG Icon
You've downloaded a perfect icon from a free icon library, but it's a bit too bold and you need to make it thinner. You open the SVG in your text editor and find its `<path>` or `<circle>` elements. Instead of a graphical stroke slider, you look for the `stroke-width` attribute. You change it from `stroke-width="5"` to `stroke-width="2"`. This gives you the exact, lighter look you need.
Scenario 3: Adjusting Scale and Size
The icon you downloaded is 24x24 pixels, but you need it to be responsive and scale to any size. The secret is changing the `width` and `height` attributes to `100%` and setting the `viewBox` to reflect the original coordinate system. For a 24x24 icon, you'd change the `<svg>` tag to: `<svg xmlns="..." width="100%" height="100%" viewBox="0 0 24 24">`. Now, when you embed this SVG into your HTML, you can control its size simply with CSS, and it will always be crisp and pixel-perfect.
Design Without Words Is Decoration
Understanding the visual language of SVG is a key part of effective design. This article explores the deep connection between words and visuals in creating a powerful brand identity.
Read the ArticlePart 5: Comparing the Code-First Approach to Other Tools
To give you a complete picture, let's contrast the code-first workflow with its alternatives. This isn't about declaring a 'winner' but about helping you choose the right tool for the right job. The landscape of vector graphics tools is more diverse than ever, and each has its strengths.
**Adobe Illustrator / Figma / Sketch** are the heavyweights of the design world. They are incredibly powerful for the initial creation of complex vector art, illustration, and layout. A designer will naturally start here. However, they are memory-intensive, sometimes slow to launch, and often overkill for a developer who simply needs to tweak an asset, change a color, or ensure it's formatted correctly for the web.
**Browser DevTools** offer the best of both worlds: a live, visual edit with instant feedback. It's perfect for quick visual tweaks, debugging, and experimentation. But it's not meant for permanent, large-scale changes, and any edits made here are lost when the page refreshes.
Finally, we have the **Code-First (Text Editor) Approach** described in this guide. It provides the best of both worlds: speed, precision, and automation. It's the core of a developer's workflow, seamlessly integrating with version control and build tools. While it may not be the best for initial design or complex art creation, it's the most efficient way to maintain, optimize, and integrate SVG graphics into a web project.
Part 6: Advanced Topics: Animation and Accessibility
A true professional doesn't just edit the graphic; they enhance it. The code-first workflow puts you in a prime position to add animation and ensure your graphics are accessible.
Animating SVG with CSS and SMIL
Since SVG is just code, you can animate it using CSS, just like you would a `<div>`. This is one of the most powerful advantages of the code-first approach. You can target specific elements in your SVG file, like a `<circle>`, with a CSS animation. For instance, you can use the `@keyframes` rule to change the `fill` color or the `transform` (translation, scale, rotation) over time.
<svg xmlns="..." viewBox="0 0 100 100"> <style> @keyframes pulse { 0% { opacity: 1; } 50% { opacity: 0.4; } 100% { opacity: 1; } } .animated-logo { animation: pulse 1.5s infinite; } </style> <path class="animated-logo" d="..." /></svg>SMIL (Synchronized Multimedia Integration Language) is another native SVG animation format that uses `<animate>` tags. It's integrated directly into the SVG, making it highly portable.
Accessibility: Titles, Descriptions, and ARIA
Graphics are not just visual; they need to be accessible to everyone, including users of screen readers. The code-first approach lets you add semantic elements directly into the SVG.
- **`<title>`**: Provides a human-readable title for the SVG.
- **`<desc>`**: Offers a more detailed description of what the graphic represents.
- **`role="img"`**: Informs assistive technologies that the SVG should be treated as a single image.
- **`aria-labelledby`**: Associates the graphic with a title and description. `aria-labelledby="title desc"` is a common pattern.
By adding these attributes, you ensure your graphics are inclusive and meet modern web accessibility standards (WCAG).
WCAG 2.2: The Ultimate Guide to Web Accessibility
Making your SVGs accessible is part of a larger commitment to inclusive design. The Web Content Accessibility Guidelines (WCAG) are the global standard for making web content accessible to everyone.
Learn About WCAGPart 7: Maintaining Your SVG Library for Efficiency
If you work with SVG files regularly, you'll quickly accumulate a library of icons, logos, and illustrations. A pro knows that a well-organized library is a key to long-term efficiency.
Strategy 1: The SVGO Pre-commit Hook
You can use a Git pre-commit hook to run `svgo` on all SVG files that have been staged for commit. This ensures that every SVG added to your codebase is automatically optimized, preventing the accumulation of large, unoptimized files over time. Tools like `husky` and `lint-staged` make this incredibly easy to set up.
Strategy 2: Creating an Icon System
Instead of managing individual SVG files, you can create a central icon component or an SVG sprite. This streamlines the process, as you only need to update the icon in one central place for the change to be reflected everywhere it's used. This is a fundamental pattern in modern frontend frameworks like React, Vue, and Angular.
Strategy 3: The Power of Aliases
In your build tools (like Webpack or Vite), you can set up aliases for your SVG folders. This allows you to import icons with a clean, simple syntax like `import Icon from '@icons/logo.svg'` instead of navigating complex relative paths like `../../../../assets/icons/logo.svg`. This makes your code cleaner, more readable, and easier to refactor.
Common Mistakes Worth Avoiding
Even with a powerful workflow, there are pitfalls to avoid. The most common mistake is editing the `viewBox` without understanding it. Changing the `viewBox` changes the coordinate system of the graphic, which can cause elements to overlap or appear in the wrong place. Think of `viewBox` as the 'scaling and positioning instructions', not just a simple crop. A second mistake is forgetting to run `svgo`. It's easy to see that the file renders correctly and move on, leaving behind a lot of unnecessary code that can slow down your page. A third mistake is not using `aria` labels. Often, accessibility is an afterthought, but it's a crucial part of being a professional developer.
A Practical Starting Stack for Most Developers
If you're setting this up for the first time and don't want to spend an afternoon benchmarking providers yourself, a sensible default is to start with a mid-tier model across the board and upgrade selectively only where you actually hit limitations — rather than defaulting to the most expensive option everywhere out of caution. From there, create at least two presets: one pairing a strong reasoning model for Plan mode with a faster, cheaper model for Act mode on your main project, and a second, entirely budget-tier preset for low-stakes work like generating documentation, writing boilerplate, or drafting commit messages. Keep Cline's token counter visible while you work for the first week or two, specifically so you can see which tasks are actually burning through budget — it's common to discover that one repetitive task type accounts for a disproportionate share of spend, at which point switching just that task to a cheaper model is a much bigger win than optimizing your most expensive model choice.
Modern Techniques in Frontend Design
SVG is a cornerstone of modern frontend design. Mastering it goes hand-in-hand with understanding the latest techniques and trends in the field.
Read the GuideHow to Choose the Right AI Model for Cline
The code-first workflow for SVG is all about control. The same principle applies to choosing an AI coding agent—it's about selecting the right tool for the job, not the most popular one.
Read the GuideThe Bottom Line
There's no permanent answer to which tool you should use to edit SVG files, and treating this guide's specific examples as a fixed rulebook would miss the actual point — the tools are simply a means to an end. The core skill is understanding the SVG format itself.
What doesn't shift is the mindset: treat SVG as code. Embrace the precision, speed, and automation that a text-based workflow offers. Use the tools that fit the task—be it a heavy design suite, a live DevTools session, or your trusty code editor. Do that consistently, and the specific tools you plug into that workflow will matter far less than the skill and efficiency you gain in the process.
If you take away one habit from this guide, make it to always examine the SVG code of any graphic you work with. Open it in your editor, look at the `viewBox`, inspect the `<path>` data, and scan for styles. This simple act of observation will demystify the graphic and reveal the most efficient path to any edit you need to make. This feedback loop of understanding the code is what will truly turn you into a professional.
(Frequently asked questions)
Can I really edit an SVG file without any design software like Illustrator or Figma?
Absolutely. An SVG file is fundamentally a text file written in XML (a markup language). This means it can be opened, edited, and saved using any standard code editor, such as VS Code, Sublime Text, or even Notepad. By editing the code, you can change colors, sizes, positions, and more.
What is the 'viewBox' and why is it so important?
The `viewBox` attribute defines the coordinate system for the SVG. It tells the browser how the elements inside the SVG should be scaled and positioned to fit within the set `width` and `height`. For example, `viewBox="0 0 100 100"` creates a 100x100 grid. Changing the `viewBox` changes the entire coordinate system, which can completely alter how your graphic is displayed.
How do I change the color of an SVG file using code?
You can change an SVG's color by editing its `fill` (for the interior of shapes) or `stroke` (for outlines) attributes. You can use color names (like `red`, `blue`), hex codes (like `#FF5733`), or RGB/RGBA values. You can use find-and-replace in your code editor to update these colors across multiple files.
What is SVGO and why should I use it?
SVGO (SVG Optimizer) is a popular command-line tool that optimizes SVG files. It removes unnecessary metadata, comments, and hidden elements, and simplifies paths. Using SVGO can reduce an SVG's file size by 50-90% without any visible change in quality, making your website load much faster.
Is it possible to animate an SVG just using code?
Yes. You can animate SVG elements with CSS, using `@keyframes` just like you would for HTML elements. This is a powerful and performant way to add motion to your web graphics. SVG also has its own native animation format called SMIL, which uses tags like `<animate>`.
How do I make my SVG files accessible for users with screen readers?
You can make SVGs accessible by including semantic, human-readable information inside the SVG file itself. Use a `<title>` tag for a short name, a `<desc>` tag for a longer description, and consider adding `role="img"` and `aria-labelledby` attributes to properly associate these labels with the graphic.
How do I scale an SVG icon without losing quality?
The key to perfect scaling is the combination of `viewBox` and `width`/`height`. Set the `viewBox` to the exact coordinate system of your design (e.g., `viewBox="0 0 24 24"` for a 24x24 icon). Then, set `width="100%"` and `height="100%"`. This allows the SVG to be sized via CSS (e.g., `width: 50px;`) and it will scale perfectly.